How to Make Hash at Home: An Easy Guide
Key takeaways
- How to make hash at home comes down to three basic methods: hand-rolling, dry sift, and bubble hash.
- You don’t need expensive equipment, most of what you need is probably already in your kitchen or bathroom.
- Starting with decent quality bud gives you a better end result, even with the simplest method.
- Hash is just concentrated trichomes (the sticky crystals on weed), so any method that collects those crystals is the idea.
- Once you’ve made it, there are several easy ways to enjoy it, and we’ve got a full guide on that too.
Making hash at home is genuinely straightforward. You collect the sticky crystals (called trichomes) from your weed, press or roll them together, and that’s your hash. No lab, no complicated gear, just a little time and the right technique.
What is hash, actually?
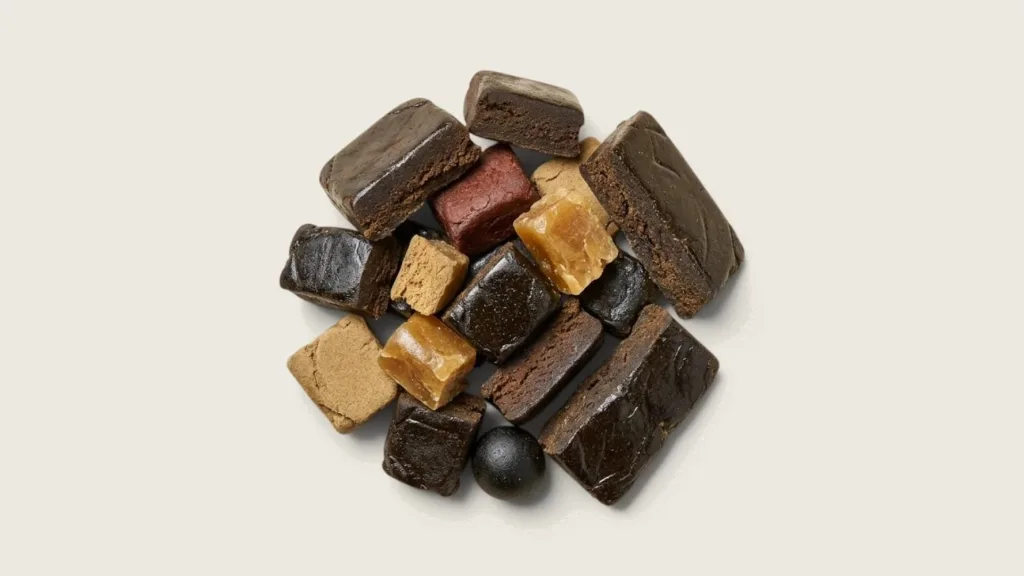
Hashish has been around for a very long time. At its most basic, it’s just those tiny resin glands (trichomes) from cannabis flower, separated and pressed together into a solid block or ball. Those crystals are where the good stuff lives. Hash tends to hit differently than flower because you’re working with a more concentrated form of the plant.
You can make it from fresh bud, dry trim, or even the shake and leftovers at the bottom of your bag. That’s part of why it’s such a practical option, it’s a great use of material you might otherwise toss.
What you’ll need before you start
The gear depends on which method you pick, but here’s what’s useful across all of them:
- Dry, quality cannabis flower or trim. Check out our bulk flower if you want a good starting point without overspending.
- Clean, cold hands or gloves (cold keeps the trichomes from sticking to your skin instead of your product).
- A clean, hard, flat surface for working on.
- A credit card or something similar for scraping.
- Optional: a fine mesh screen (like a silk screen or herb grinder with a kief catcher), or a set of bubble hash bags if you want to go the water route.
The flower you start with matters. Better bud means more trichomes to work with, which means better hash. That said, even value flower works fine for your first attempt, you’re practising the process, not entering a competition.
How to make hash at home: three methods
Method 1: Hand-rolling (the oldest and simplest)
This one needs zero equipment. It’s slow, but it works.
- Make sure your hands are clean and cold. Run them under cold water and dry them well.
- Take a small piece of dry flower and roll it between your palms slowly, with gentle pressure.
- After a few minutes, you’ll notice a dark, sticky layer building up on your hands. That’s resin.
- Keep rolling until you’ve collected a decent amount, then scrape it off your palms with a credit card or a clean knife.
- Roll that collected resin into a small ball. That’s your hand-rolled hash.
It’s not the most efficient method and your yield will be small. But it’s a good way to understand what you’re actually doing before moving to anything more involved.
Method 2: Dry sift (the everyday method)
This is probably the most practical method for most people at home. You’re basically sifting the trichomes off the bud through a fine screen.
- Freeze your bud for a couple of hours first. Cold makes the trichomes more brittle and easier to knock loose.
- Place a fine mesh screen (or even a silk screen used for screen printing) over a clean, flat surface.
- Gently break up your bud and work it across the screen in a slow, circular motion.
- The fine powder that falls through is called kief. Keep going until you’ve collected a good pile.
- Once you have enough kief, press it firmly together using the flat of a spoon, a hash press, or just wrap it tightly in cellophane and use your hands. Some people use a hair straightener on the lowest heat setting to press it into a patty.
A grinder with a kief catcher does a slow version of this over time. If you’ve been grinding weed for a while and haven’t checked your kief chamber, open it up, you might already have a decent amount waiting for you.
Method 3: Bubble hash (cold water method)
This takes a bit more setup, but it produces clean, quality hash that many people think is the best of the home methods.
- You’ll need bubble hash bags (a set of mesh bags in different micron sizes, sold at most accessory shops).
- Fill a bucket with ice water. Add your cannabis material and stir it around for about 15 to 20 minutes. The cold water and agitation knock the trichomes free.
- Drain the water through your bubble hash bags, nested with the finest bag on the outside and the coarsest on the inside, so the water passes through the coarsest bag first.
- What’s left on the fine mesh bags is your hash. Scrape it off carefully.
- Spread it on a clean surface and let it dry completely before you press or use it. Damp hash can go mouldy if you store it too soon.
This method gives you a purer product because water separates plant material from the trichomes better than dry methods. It’s a bit of a project, but worth trying if you’re into it.
Quick method comparison
| Method | Gear needed | Difficulty | Yield |
|---|---|---|---|
| Hand-rolling | Just your hands | Easy | Low |
| Dry sift | Fine screen, flat surface | Easy to moderate | Medium |
| Bubble hash | Bubble bags, bucket, ice | Moderate | Medium to high |
Storing your hash
Keep it in a small airtight container, away from light and heat. A cool, dark drawer works fine. If you made bubble hash, make sure it’s fully dry before sealing it up. Hash keeps well for a good while when stored properly, much longer than loose flower.
Don’t store it in plastic wrap long-term. The oils in the hash can stick to plastic, and over time that affects the smell and the quality. Glass is better.
Tip: Press your dry sift hash into a small disc using a folded piece of parchment paper and the bottom of a glass. Quick, clean, no special tools needed.
What to do with your hash once it’s made
You’ve got options. You can crumble a little into a joint with some flower, smoke it in a pipe, or use a bong. If you want to know more about the different ways to go about it, our guide to simple ways to smoke hash at home covers it clearly.
For the gear side of things, check out our Accessories section if you need screens, grinders with kief catchers, or anything else to get set up.
Frequently asked questions
Do I need a lot of weed to make hash at home?
Not necessarily, but more starting material means more hash at the end. Hand-rolling works with a small amount, though your yield will be pretty modest. Dry sift and bubble hash are more efficient with a larger quantity of flower or trim.
Can I use trim or shake instead of whole bud?
Yes, absolutely. Trim and shake still have trichomes on them, just generally fewer than on the bud itself. It’s a solid way to get more use out of material you’d otherwise toss. Many people save their trim specifically for this.
Why does my kief look green instead of golden?
Greener kief usually means there’s more plant material mixed in, not just trichomes. That can happen if you’re pressing too hard on the screen or using a coarser mesh. A finer screen and a lighter touch keep it cleaner and more golden.
Is bubble hash hard to make?
It takes a bit more time and a few more supplies, but the actual process isn’t complicated. The main things to get right are keeping everything cold and making sure the hash dries completely before you store it.
How do I know when my bubble hash is dry enough to store?
It should feel crumbly and not sticky when you press it lightly. If it still feels damp or pliable, give it more time. Storing it wet is the main way people run into mould problems.
What’s the easiest method if I’m trying hash-making for the first time?
Hand-rolling is the easiest to start with because you need nothing extra. Dry sift is a close second and gives you a better yield with just a basic screen. Try hand-rolling once to get the feel for it, then move to dry sift when you’re ready for a bit more output.